Field Intelligence • Map Awareness • Tactical Positioning

Fantasy Battlefield Maps & Vision Mastery

Navigate the sprawling battlefields of Baldur's Gate 3 with surgical precision. This Field Visionary maps guide breaks down terrain, fog of war, control points, and exploration routes so your squad always sees one step beyond the enemy.

Optimized for Hungary-based players seeking an authoritative fantasy strategy game and RPG guide to tactical multiplayer fantasy world maps.

Fantasy Battlefield Maps Overview

Every major encounter in Baldur's Gate 3 plays out on intricate tactical arenas. These fantasy battlefields are more than backdrops: they define sightlines, engagement ranges, and the tempo of every push, flank, and retreat.

Core Map Concepts

How Maps Shape the Field Visionary Experience

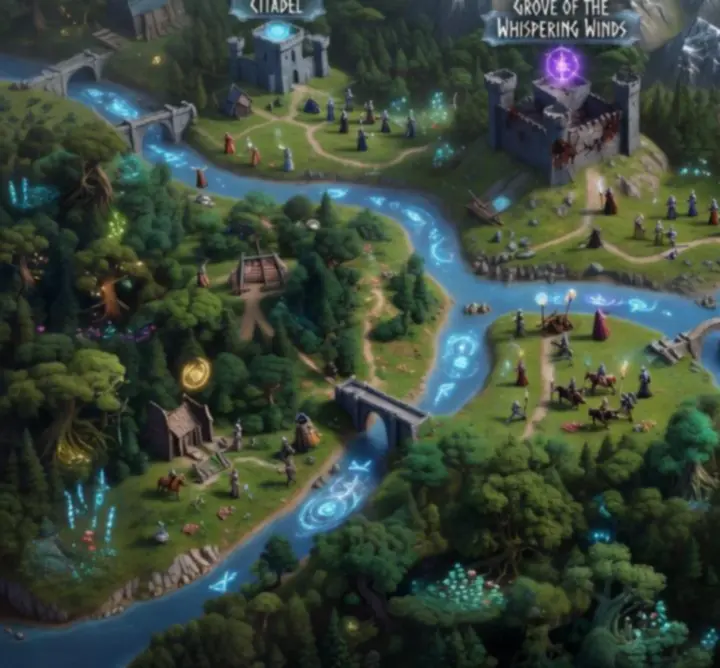
Baldur's Gate 3 combines classic tactical gameplay with rich RPG environments. Verticality, chokepoints, and environmental hazards turn each map into a layered puzzle where positioning is as lethal as any spell.

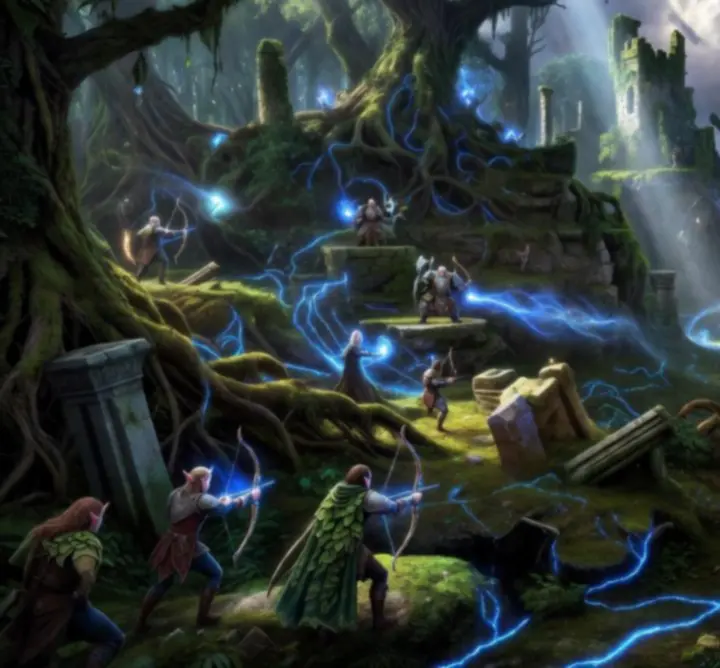
  • Engagement Layers: Multi-level platforms, rooftops, balconies, and cliffs turn combat into a 3D chess match.
  • Danger Zones: Pits, explosive barrels, traps, and elemental pools reward players who read the field before committing.
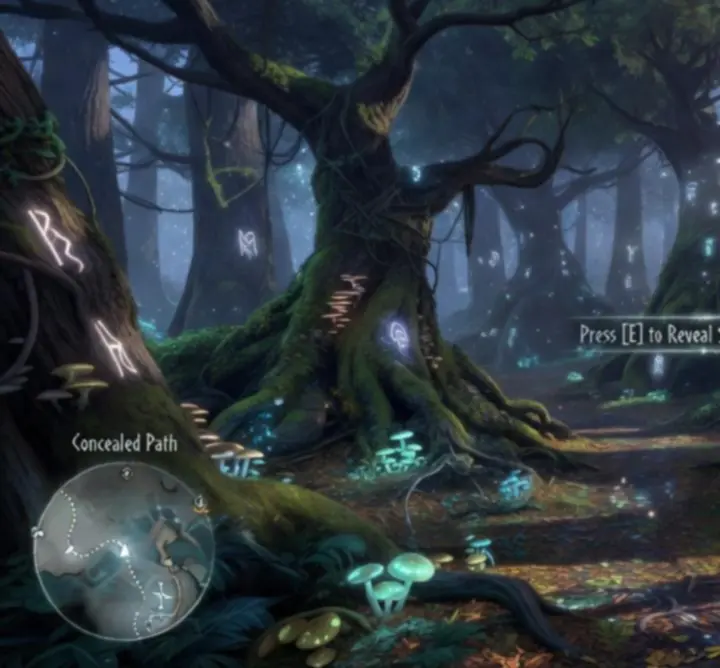
  • Vision Lanes: Corridors, doorways, stairs, and broken walls control line of sight and dictate who lands the first strike.

Field Visionary focuses on reading these cues to create a battle strategy where your team never walks blind into a bad engagement.

Strategic Zones & Terrain Features

From haunted ruins to luminous forests, each Baldur's Gate 3 battlefield divides into zones with distinct tactical identities. Understanding these layers is key to dominating any fantasy strategy game skirmish.

High Ground & Elevation Bands

Ranged supremacy and control vision

High ground funnels enemies through predictable routes and extends the reach of archers, warlocks, and casters. In Baldur's Gate 3, elevation often decides the first and final blows of an encounter.

  • Secure rooftops, ledges, and towers before triggering combat.
  • Place controllers and crowd-control casters above major chokepoints.
  • Use jump, Misty Step, and teleport abilities to claim unreachable perches.

Chokepoints & Kill Corridors

Turn narrow paths into damage funnels

Bridges, tunnels, staircases, and doorframes compress enemy formations, multiplying the impact of area spells and traps. Good map sense converts tight space into free damage.

  • Open with crowd control at the mouth of a choke, not in the center.
  • Stack lingering hazards (grease, fire, clouds) to punish clustered enemies.
  • Anchor your frontline just behind the choke so enemies must step into danger to reach you.

Elemental & Magical Biomes

Harness the environment as an extra party member

Poison clouds, flammable pools, lightning-charged water, and cursed ground appear across Baldur's Gate 3 maps. Properly used, they convert your RPG guide knowledge into brutal battlefield efficiency.

  • Chain elements: water + lightning, grease + fire, poison + fire denial.
  • Knock enemies into hazards rather than spending spell slots on raw damage.
  • Reposition your squad before environmental triggers like geysers or rune pulses.

Vision Mechanics & Fog of War

Field Visionary is built on the idea that information wins battles. In Baldur's Gate 3, line of sight, stealth cones, and partial cover transform every map into a shifting vision puzzle.

Reading Line of Sight

Vision is blocked not just by walls but by elevation breaks, pillars, and even large objects. Strong tactical gameplay comes from anticipating what the enemy can and cannot see.

  • Use corners and pillars to break overwatch lines before committing.
  • Position fragile casters where only your chosen targets have a clear shot.
  • Abuse blind angles: ledges above doorways or behind broken walls are ideal ambush nodes.

Fog of War & Information Control

While Baldur's Gate 3 does not use a hard real-time fog of war, exploration, perception checks, and stealth dictate how much of a battlefield you effectively "see" at any given moment.

  • Scout with stealth-capable characters before moving your full squad.
  • Pre-mark priority threats (casters, leaders, artillery) before open conflict.
  • Keep one character out of line of sight to anchor retreat or flank rotations.
Adventuring party discovering a secret path across a fantasy battlefield

Interactive Exploration & Secret Paths

Exploration is the other half of map mastery. Hidden ladders, destructible walls, and forgotten tunnels let commanders bypass fortified approaches and create surprise angles in this multiplayer fantasy world.

Discoverable Shortcuts

  • Vertical Ladders & Ropes: Unlock new firing lines and safer traversal between levels.
  • Breakable Surfaces: Stone floors, weakened barricades, and wooden bridges can all be collapsed to open or deny routes.
  • Hidden Passages: Successful perception checks reveal tunnels and back doors perfect for flanking.

Environmental Interactions

Your party's skills and spells unlock unique map tech:

  • Thunderwave and shove to clear debris or knock enemies off ledges.
  • Mist Step, Dimension Door, and flight to cross chasms or reach hidden balconies.
  • Speak with Animals or special dialogues to reveal secret routes and safe paths.

Used correctly, these interactions turn exploration knowledge into raw game tips and win conditions.

Key Control Points & Objectives

Not all tiles are equal. Certain ledges, bridges, and central plazas function as soft control points that decide the outcome of tough encounters.

Spawn & Entry Lanes

Know where enemies enter the map. Many BG3 encounters have predictable arrival lanes that can be trapped or pre-aimed.

  • Pre-plant explosive barrels or hazardous surfaces along approach corridors.
  • Hold action with archers and casters to trigger alpha strikes as enemies cross thresholds.
  • Use dialogue or stealth to position before combat flags in scripted fights.

Power Nodes & Ritual Sites

Some arenas feature altars, ritual circles, levers, or arcane devices that reshape the fight when captured or disabled.

  • Assign one mobile unit to contest or disrupt objectives each round.
  • Delay finishing blows if flipping a lever can end the encounter more safely.
  • Plan turn order so your objective-runner acts after enemy casters commit.

Anchor Positions

Anchor spots combine cover, sightlines, and escape routes. Controlling them gives your battle strategy a stable core around which the rest of the squad can flex.

  • Place tanks or durable frontliners in anchor positions near natural cover.
  • Maintain at least one retreat path that is not directly visible to ranged threats.
  • Rotate the whole formation around anchors rather than chasing scattered enemies.

Battlefield Evolution & Dynamic Events

Some encounters in Baldur's Gate 3 simulate living battlefields. As turns pass, new enemies spawn, magical storms ignite, and previously safe zones become lethal.

Environmental Phases

Dynamic events often follow predictable patterns that you can plan around:

  • Rising flames or poison clouds that shrink safe zones over several rounds.
  • Summoned waves of enemies arriving from fixed portals or entry points.
  • Timed ritual completions that empower bosses if not interrupted.

Strong tactical gameplay means trading short-term damage for long-term positional or objective advantage when these timers start ticking.

Adapting Your Formation

  • Plan a fallback line ahead of time and pre-position healing or control there.
  • Use mobility tools (dash, jump, teleport) sparingly until the map shifts.
  • Rotate the party as a unit; avoid leaving single characters stranded behind shifting hazards.

This adaptive mindset is the core of the Field Visionary approach: never treat a map as static, especially in late-game or high-difficulty encounters.

Competitive Map Strategies

Whether you are pushing Honour difficulty, min-maxing turn efficiency, or simply craving cleaner fights, structured formations and route planning unlock a new level of precision.

Formation

Standard Field Visionary Formation

1 Tank • 2 Damage • 1 Control/Support

  • Front Anchor: Durable melee on partial cover, slightly ahead of the line.
  • Offset Damage: Ranged or spellcaster 1 elevation step above or diagonally behind the anchor.
  • Backline Controller: Support in central position with clear vision lanes to both flanks.

Use this default shell on unfamiliar maps, then flex roles as terrain demands.

Routes

Safe & Aggressive Paths

  • Safe Routes: Prioritize cover, high ground, and distance from potential spawn points.
  • Aggressive Routes: Cut through chokepoints with pre-placed hazards and hard engage tools ready.
  • Hybrid Routes: Start safe, then pivot into flanking ladders or tunnels once vision is secured.

Our detailed Strategy Guides pair these route types with specific encounters and party compositions.

Vision Tech

Field Vision Tactics

  • Open fights from darkness or high ground to control the first action cycle.
  • Use familiars and summons as disposable scouts in unknown sectors.
  • Exploit lighting: use darkness and fog effects to selectively deny vision.

These advanced game tips turn “information advantage” into concrete extra turns of damage and safety.

Turn Every Battlefield into a Calculated Victory

Use what you've learned here to elevate your runs: pre-plan formations, study elevations, and treat every map as a strategic puzzle rather than a backdrop. Field Visionary's mission is to give Hungary-based players an authoritative hub for mastering this fantasy strategy game at a competitive level.